Home | Glass canopy
Glass canopy
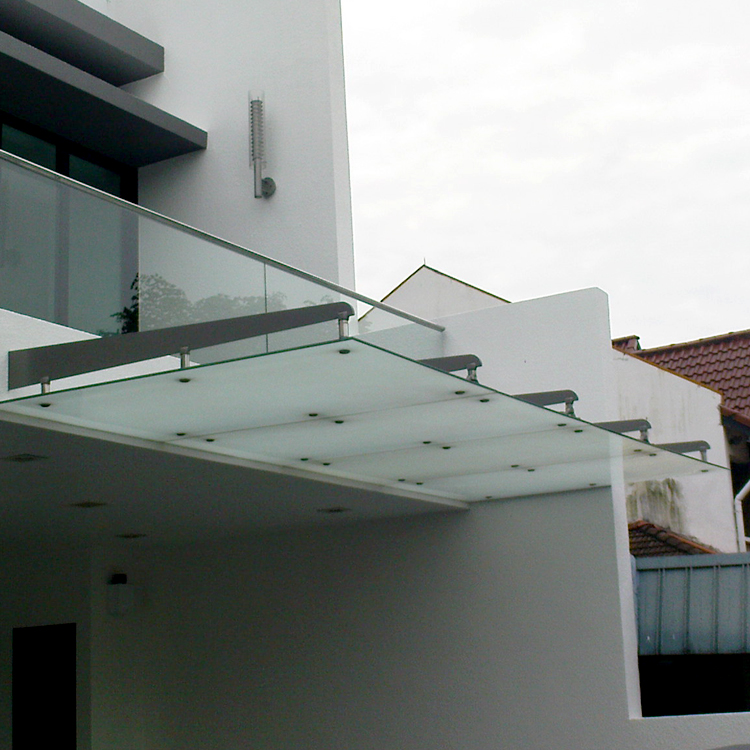
stainless steel tempered glass canopy
- stainless steel
- laminated glass
- Product description: stainless steel tempered glass canopy
Glass canopy material list
| Item | Material | Finished |
| Glass | 5+5/6+6mm laminated tempered glass | clear color |
| Metal | 60x40mm Iron steel,powder coated on suface | gray color or other color |
Steel canopy construction program
1, processing and unloading
Lofting in accordance with the construction plans, lofting and material to be set aside when welding shrinkage and allowance, according to lofting for the model. Steel correction: the steel material must be corrected before cutting, after correction of the deviation value should not exceed the allowable deviation of the provisions of the standard to ensure the quality of the expected. Hot-processed steel first hot processing, and then No. hole after cooling. Steel plate embedded parts and other parts cutting drilling and spray anti-corrosion paint treatment.
2, measuring pay-off: According to civil engineering elevation reference line measured buried centerline elevation, check the embedded parts elevation deviation, left and right deviation. Finishing the results to determine the embedded parts of the adjustment program. Along the floor along the pop-up ink lines to determine the top of the embedded parts of the top mark.
3, embedded parts installation and processing: positioning embedded parts installation location, drilling installation. Requirements embedded parts accurate location, buried solid. Height deviation is not more than 9mm, displacement is not more than 20mm.
4, the suspension arm installation welding: suspension arm installation using welding, inspection of welded joints to be required to adjust the design of the suspension arm slope, accurate and can only be welded. By the side of a suspension arm is correct, the installation of an arm on the other side, in place after the spot welding. And then use the two suspension arms as a reference to pull out the highest and lowest elevation lines of the suspension arms and weld the remaining suspension arms one by one. And welded seamless steel pipe. When the steel needs to be connected, the welding head should be welded and straightened. When using steel fittings, in order to make the fitting steel and steel embedded parts close to the design requirements should be shovel Leng Leng angle. Butt welds shall be welded on both ends of the weld arc plate, the material and the wave mouth the same type and weldment, gas cutting after cutting and grinding.
5, calibration test: After the suspension arm first check the site connection site quality. Suspension arm installation quality mainly to check the vertical surface of the suspension arm is not vertical; under pressure on the vertical side of the hanging sag; hanging arm slope. To ensure that the suspension arm meets the design stress state and the overall stability requirements.
6, the connection force cable: positioning rod baseline, elevation line, according to the requirements of the installation of embedded parts, welding railings.
7, stainless steel glass claw installation and welding: according to the design dimensions pop-up lines and design elevation, clamping fixture, positioning spot welding, assembly is completed, welded glass claw base.
8, anti-rust paint treatment: slag and spatter should be cleared, the surface of stainless steel spray white paint spray rust treatment over many times. Coatings and film thickness should meet the design requirements or construction specifications. To the inside of the steel legs paint can not slippery.
9, laminated glass processing production and installation: According to the design requirements combined with the measured size to determine the size of the glass, and the horizontal and vertical position, the manufacturers processing. Install stainless steel glass claw, glass after the temporary fixed to adjust, adjust the standard horizontal, vertical, flat surface. Deviations shall not exceed the specified deviation.
10, adjust the test: point glass for the overall adjustment test, adjust the standard horizontal, vertical, surface level. Deviations shall not exceed the specified deviation.
11, glue up and down: full clean the gap between the glass, there should be no water, grease, paint, rust, cement mortar, dust and so on. Fully clean the bonding surface, to be dry. To adjust the depth of the seam, avoid trilateral glue. Protective film on both sides of the seam tape protection glass is not contaminated. Sealant up and down at the same time, plastic glue after the surface will be smooth, remove excess glue. Plastic injection is completed, the protective paper tear off, if necessary, wipe the glass with solvent. Do not touch the dust and scratches before the glue has hardened completely.
12, repair test: partial repair test.
13, glass cleaning: to determine the various parts are no problem after the overall cleaning glass dust, wiping the glass with solvent if necessary, waiting for acceptance.

PREVIOUSпјљstainless steel glass canopy
NEXTпјљstainless wire glass canopy
Categories
Latest News
Contact Us
Contact: Jason Zhou
Phone: +86 13378473680
Tel: +86 13378473680
Add: Lishui Town, Nanhai Dist.,Foshan,China


 Jason
Jason